- March 7, 2023
- Posted by: Daria Krutkova
- Category: Blog
How to Edit a GIF in Photoshop: Simple Tips and Tricks!
GIFs are a fun and easy way to share your content with the world. You can make a GIF from anything you want, from a video to an image to a song! However, if you’re new to the world of GIFs, you might need some help getting started. Luckily, there’s nothing more fun than knowing how to edit a GIF in Photoshop. Photoshop is one of the best tools for editing this 30-year-old video format technology.
So, you can use it to create GIFs that make your friends think you’re an expert at Photoshop. You’ll be able to add animation by creating new frames, adding them to your video or image, and inserting text into your GIF. You can also change the colors and brightness of an image before saving it as a GIF file. This article will walk you through everything you need to know about how to edit a GIF saturation in Photoshop, using the tool, and much more.
Step-by-step guide
If you’ve tried to use a GIF in Photoshop, you know it can be a pain. You have to find the right filters, and tracking down the right tool is tough. But what if there was an easier way? What if you could open a GIF in Photoshop and start editing it right away? So, here is how to edit all layers of a GIF in Photoshop.
Open your GIF
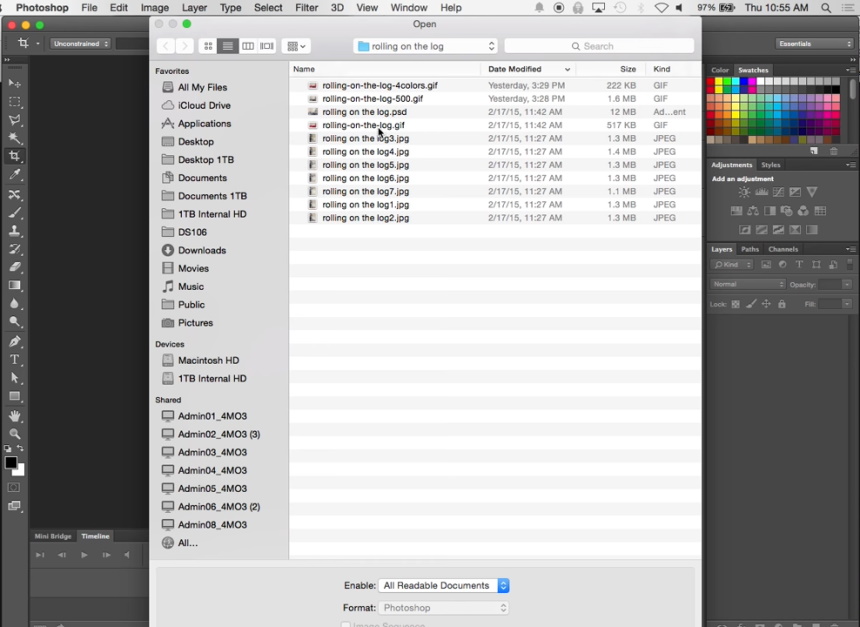 Start by launching your Photoshop program. Depending on your computer’s capability, it will take a few seconds to load. Once done, it’s time to add the GIF file you want to edit. To do so, navigate to the top bar menu, tap “File, ” and select” Open.” A pop-up file explorer window will appear. Select the file location from your computer storage and tap on it to add it to your Photoshop.
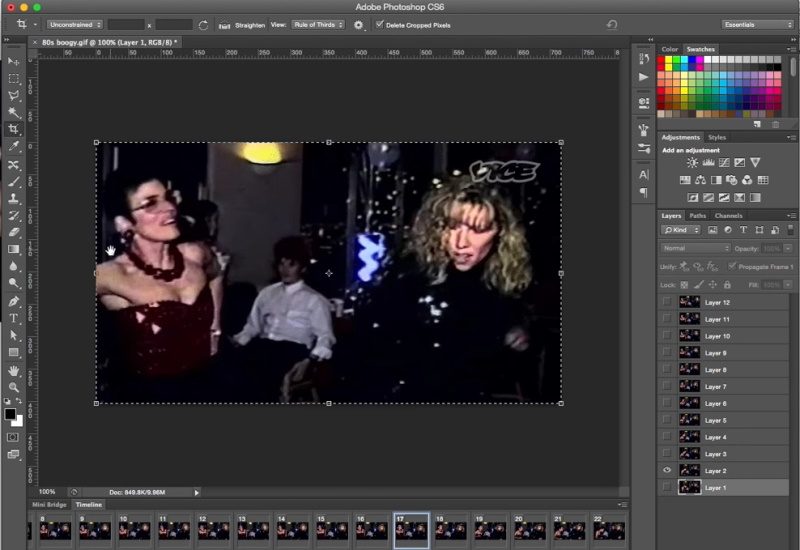
The program will load your file, and you will notice that it has split your GIF into frames. Each frame will be in a different layer panel. You could have five layers or even 20 depending on the length of your file. The layers help you edit individual frames of your GIF.
Set up your workspace
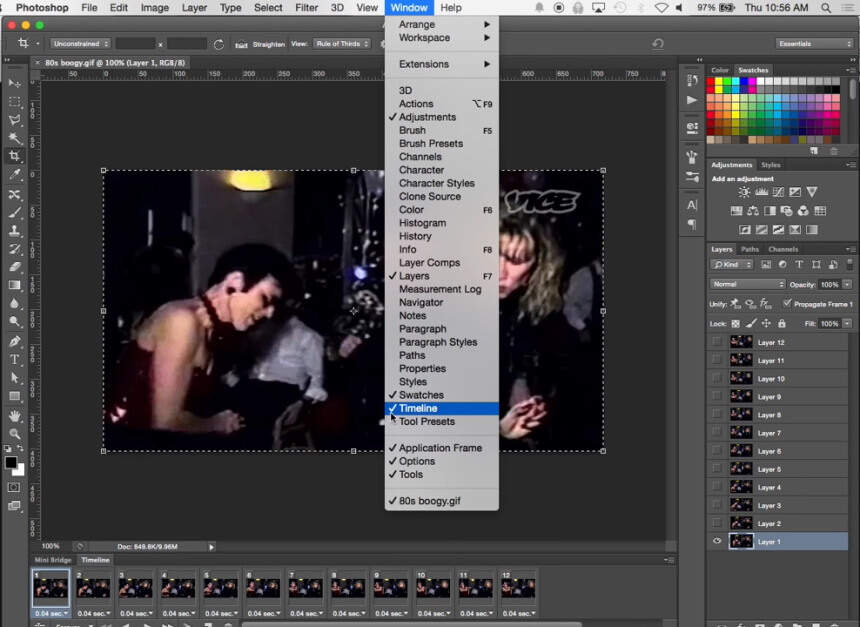
Photoshop is designed to edit videos and not GIFs. So, if you must edit a GIF in it, start by setting up your workspace. You will use some of the video editing tools to edit your file. Start by selecting the timeline. This will open up a free transform timeline window with several options for adjusting how your GIF looks and where it ends up after being transformed. You can also use this option to adjust other aspects of your GIF, such as size or position within its frame.
A timeline is a tool that lets you select specific portions of your GIF and move them around as you see fit. It lets you add text or other elements, move them around (or even delete them), and make changes to their color or transparency. You can use it on any part of your GIF—the whole image or just one section at a time. This tool will also let you control other aspects of your GIF length and the time every frame will be displayed. You can also change the sequence of your frames by moving the layers as needed.
How to add adjustment layers?
 The best way to edit your GIF in Photoshop is to use adjustment layers. You can also use the curves tool and some other tools, but that’s pretty much it for editing. Adjustment layers are great because they let you change multiple things at once, so you don’t have to do each one individually—which would take forever!
The first way on how to edit all frames of a GIF in Photoshop cs6 or cs5 is to select your last frame on the timeline. It would be best if you went to the “Layers Panel” and made any adjustments you wanted. Any edits you make will be applied to all the preceding layers and frames.
You can also make changes to an individual layer. All you need to do is select the frame in question from your timeline. Go to the “Layers Panel” and scroll to the same layer. Select it and open your Layer Menu. Next, tap “New Adjustment Layer,” and don’t forget to check the option “Use the Previous Layer to Create Clipping Mask.” Make all the necessary changes you need in that particular frame. Once you are done, apply the changes, which should take effect.
You can edit an individual frame using the “Adjustments Panel” instead of the “Layers Panel.” However, this option doesn’t allow you to use the previous layer to create a clipping mask. Instead, you will have to make your changes first. Once done, tap on” options,” “and place your cursor before the previous layer. This action will let you use the previous layer to create a clipping mask. All the changes made will only apply to one layer.
Extra edits
 In addition to the tools discussed, there are a few more ways to edit a GIF in Photoshop. You can use filters and effects to make your GIF more interesting, like adding watermarks, emojis, or other text effects. You can also create animations with the selection tool and play them as an animation. Some special tools include the following:
- The clone tool. The clone tool lets you take one frame from your GIF and duplicate it into another frame of the same GIF. This means that you can make an animation loop or repeat an image over and over again.
- The fill tool. The fill tool lets you add color to specific parts of your GIF. This is useful for creating gradients in your GIFs and adding more variation to the colors in them.
- The crop tool. The crop tool lets you select which part of an image will be used for your animation or looping effect, which is great if you want to use just one frame of your GIF without having to worry about having a whole bunch of frames with different parts cut out of them!
- The Healing Brush Tool. The healing brush tool is great for fixing mistakes in your gifs—like making sure there’s no gap between two characters’ mouths when they talk. It’s also good for smoothing out uneven edges on objects like hair or clothing so that they look more natural.
- The Lasso Tool. The lasso tool lets you draw around parts of an image by clicking and dragging while holding down the shift key (it’s found under the Select menu). Try using it on areas with lots of contrast between different colors, like skin tones or hair colors, so they look less flat than other parts of your GIF.
- Artistic filters: The artistic filters are similar to what instagram uses as overlays when they share photos. You can bring these overlays into Photoshop and edit how they look. The artistic filters include watercolor effects, pencil strokes, and more!
- Magic Wand Tool. To make your GIF more interesting, you can use the Magic Wand Tool to select a portion of the image and apply a different color or texture. You can also use this tool to select an object by its outline, then edit it by selecting a different shape and applying a different color or texture.
- The Move Tool. The Move Tool is another great way to help you make your GIF more interesting. With this tool, you can move objects around in your image while keeping their original positions. You can also use this tool to move objects around in their own space instead of moving them relative to each other (which would change their positions).
- Rectangular Marquee Tool. Use the Rectangular Marquee Tool (or the Polygonal Lasso Tool if your environment supports it) if you need to round off corners or add curves to an object in your GIF. This tool allows you to draw rectangles or circles based on any point on the edge of those shapes, making them smoother and more realistic.
The above are just a few tools you can use to improve the quality of your output. We recommend experimenting with various tools when learning how to edit a gif in Photoshop cs5 or version cs6. With practice and experimentation, you will master the craft.
Exporting your GIF
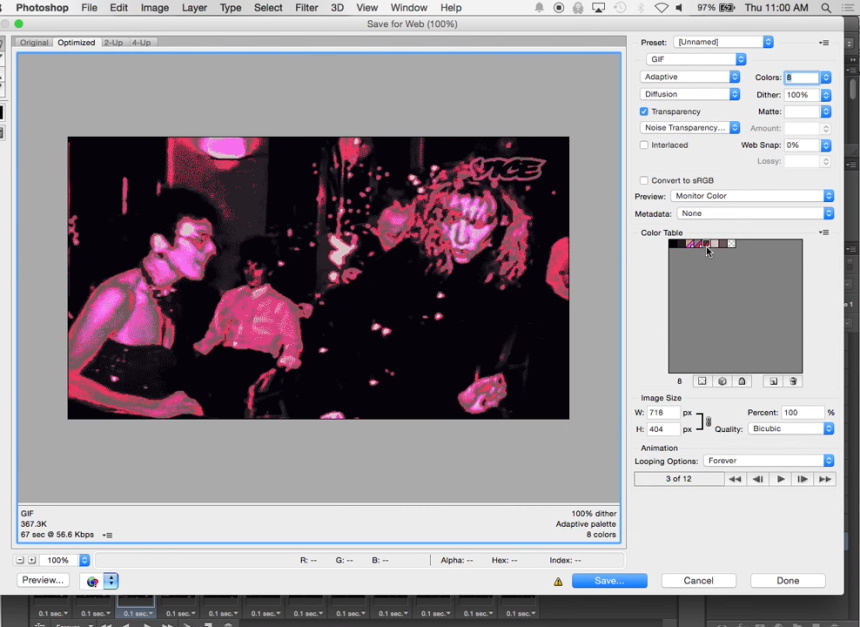
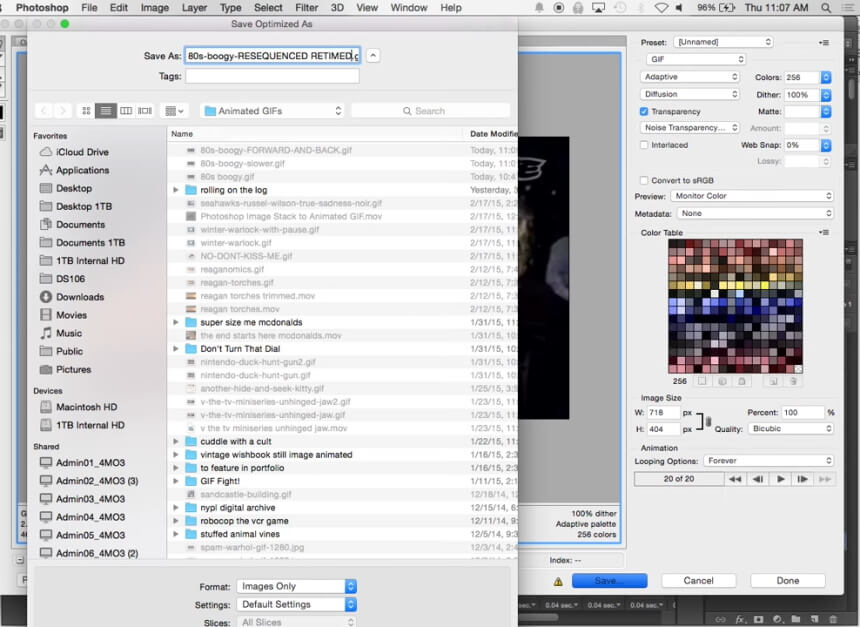 If you’re wondering how to edit a GIF in Photoshop cs6 or cs5, here is where you put it all together. You’ll need to go to file> Export > Save for Web File to export your GIF. While here, you can also customize any aspect of your GIF before exporting—including sizing, colors, quality, looping options, etc. This means you can ensure it fits perfectly with your brand’s aesthetic and personality before exporting it!
Final thoughts
With all these GIFs in our lives, you should be doing more than just using them for memes. You could use them as a way to create more engaging content or even as a way to tell stories. If you’re looking for ways to edit GIFs in Photoshop, there are many different options.
The best thing you can do is try different things and see what works best for your brand’s tone. If your content is lighthearted and fun, then it’s best to use tools and Photoshop filters to bring this out. If your content is more somber, avoid using any filters. Remember that the best way to learn how to edit GIF in Photoshop is through practice. Becoming a good editor is a journey. You can’t just learn it once, then move on to the next. You have to keep practicing and improving your skills as time goes on.
